

In this bonus post, we will cover how to connect an on-premises Session Recording server with the Citrix Session Recording service in Citrix Cloud.
For larger deployments with multiple Session Recording servers, integrating the Citrix Cloud Session Recording service allows administrators to manage all session recording servers from a single console. Also, the web GUI is more modern and user-friendly than the on-premises Session Recording console interface, especially when creating event-based policies like we did in part 4 of this series. If you have a Citrix DaaS subscription, I highly recommend utilizing it.
Prerequisites for Citrix Cloud Integration
Ensure the following prerequisites are met before connecting the on-premises Session Recording server to the Citrix Cloud Session Recording service:
- Verify that the Session Recording server can reach the following sites:
- https://*.citrixworkspacesapi.net
- https://*.cloud.com
- https://*.blob.core.windows.net
- https://*.servicebus.windows.net
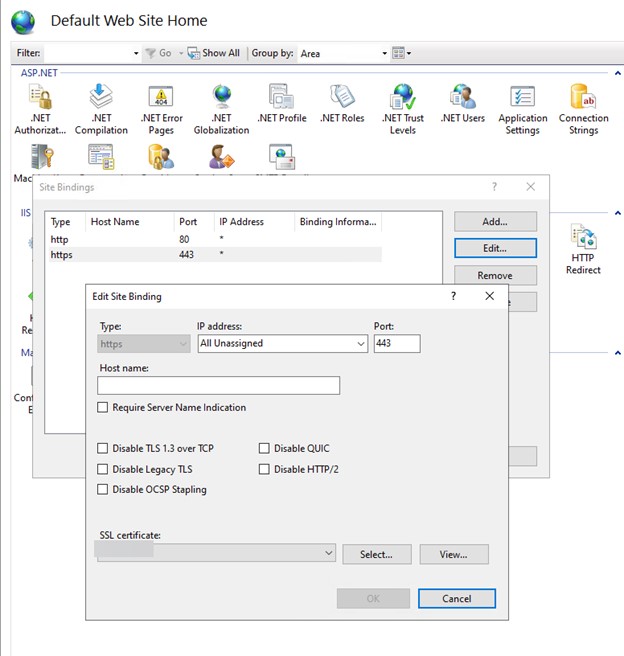
- A certificate is required on the server. This was covered in part 3 of the series, where I mentioned using a certificate was optional. However, with Citrix Cloud integration, it is required.
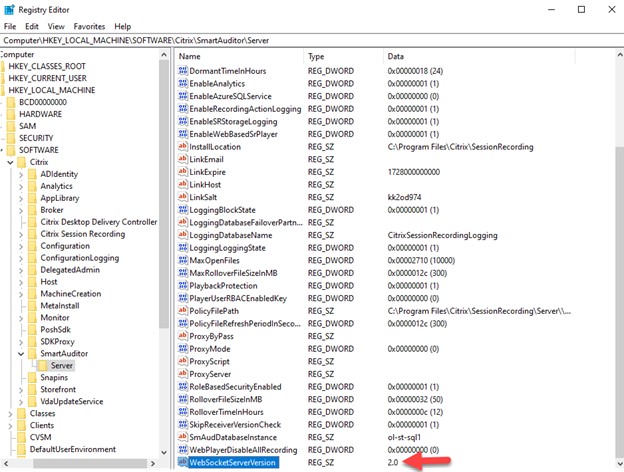
- Confirm that the Web Streaming service is running version 2.0 or higher. Open the Registry Editor and navigate to:
Computer\HKEY_LOCAL_MACHINE\SOFTWARE\Citrix\SmartAuditor\Server
Look for the key: WebSocketServerVersion
Connect Session Recording Server to Citrix Cloud
Once the prerequisites are complete, perform the following to connect the on-premises Session Recording server to Citrix DaaS:
- Log in to Citrix Cloud: Launch the Citrix DaaS tile, click Manage then click Session Recording. Since this is the first-time setup, the screen should look like this:

- Download Session Recording Cloud Client: Click the Get Started button and download the Session Recording Cloud Client.

- Note Installation Path: Make note of the path where the Session Recording cloud client installer is located. You will need this later. Have a program like Notepad ready to copy and paste data from Citrix Cloud. Click the Generate Command button.
- Configure Command Settings: Answer “No” to using a proxy setup. Enable verbose logging and specify the path to store the log file. Click the Generate Command button.
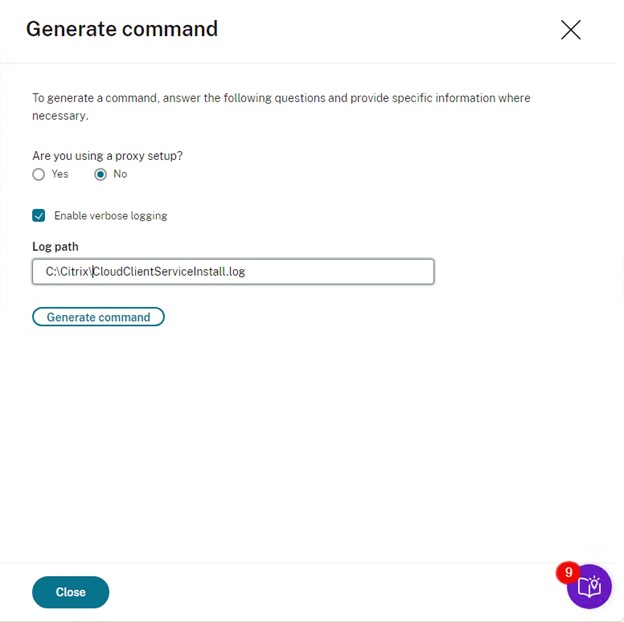
- Copy Generated Command: Copy the generated command into Notepad. The values for CUSTOMERID, CLIENTID, and CLIENTSECRET should be automatically filled in.

- Run Installer: Open a CMD prompt and navigate to the path where the Session Recording cloud client installer is located. Copy and paste the command into CMD and run it. The installer will run silently. Wait a few minutes for it to complete. You should see a message that the installation succeeded. Click Close on the Generate Command page.
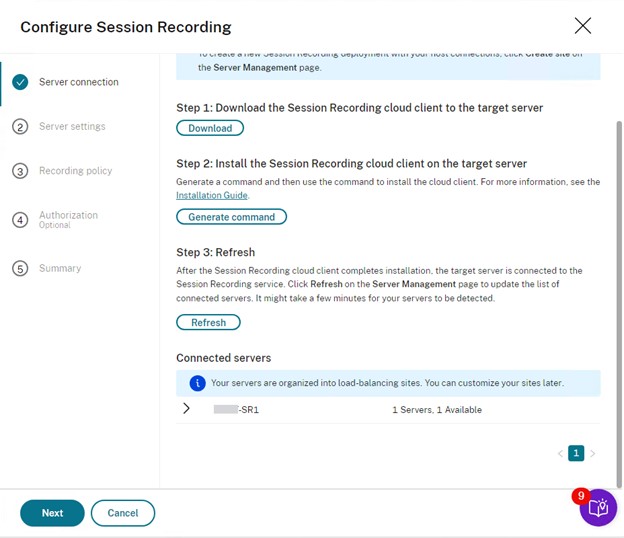
- Refresh Configuration Page: Click Refresh on Configure Session Recording page. It might take a few minutes, but the Session Recording server name should appear under the Connected Servers section. Click Next to continue.
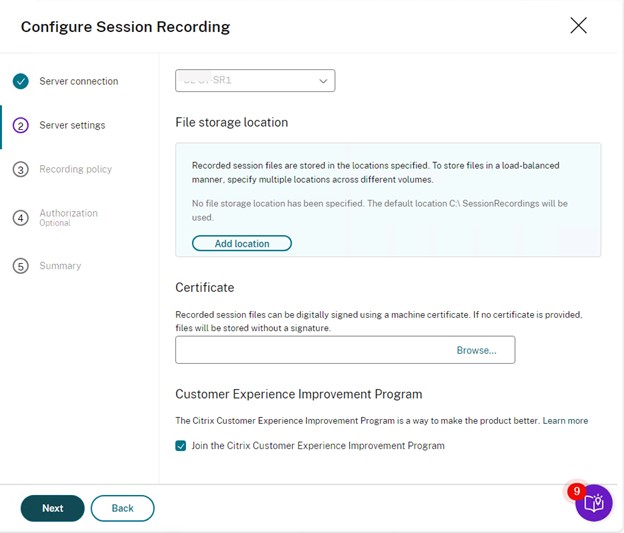
Configure Session Recording Server Settings
- Session Recording Settings:
- Storage Location: You can specify a new location to store session recordings. I will leave the current location as configured when the server was built.
- Certificate for Digital Signing: Optionally add a certificate to digitally sign your recorded session files. I will leave that as default.
- Customer Experience Improvement Program: Opt-in if desired. Hit Next to continue.
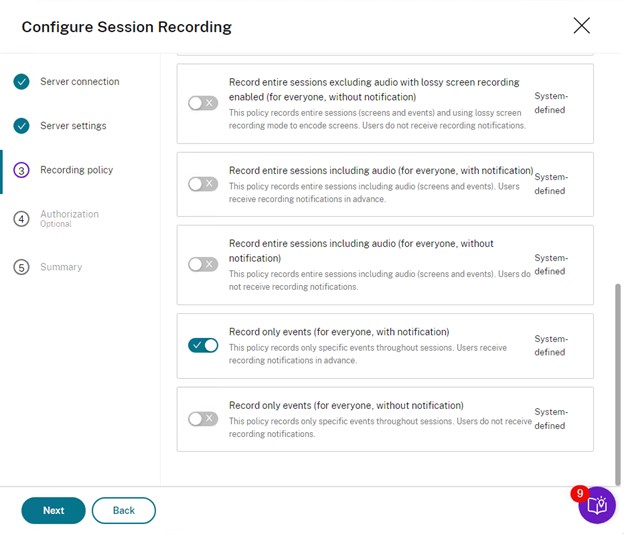
- Recording Policy: The service should detect the existing policy settings already set on the server. No changes are needed here unless you want a different recording policy. Click Next.
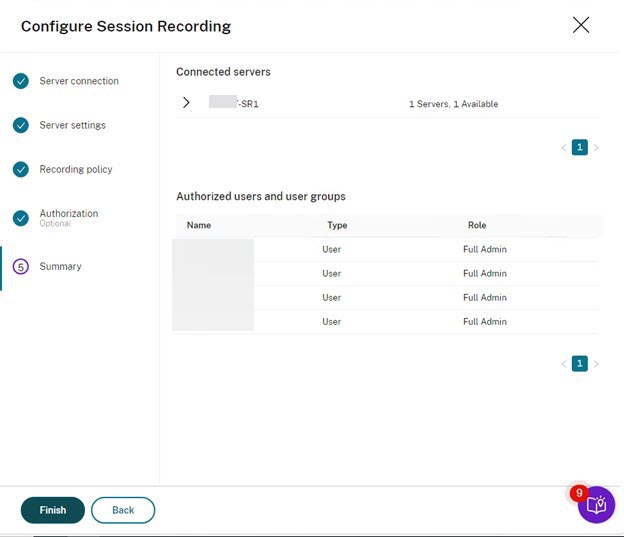
- Authorization: You will see a list of authorized users. By default, all current Citrix Cloud Full Admins will have access. To add or change users, go to the Identity and Access Management page in Citrix Cloud. Click Next.

- Summary: The last page shows the connected server and authorized users and groups. Click the Finish button.
Post-Configuration Activities
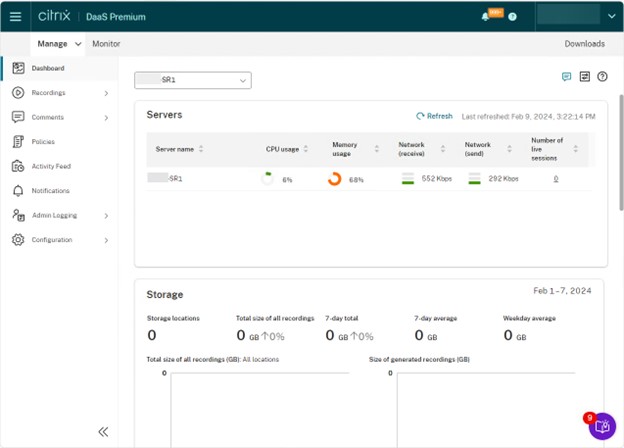
You should now be back at the main Dashboard page, connected to the Session Recording server. You can view real-time details about the server, such as CPU and memory usage, network statistics, and the number of live sessions.
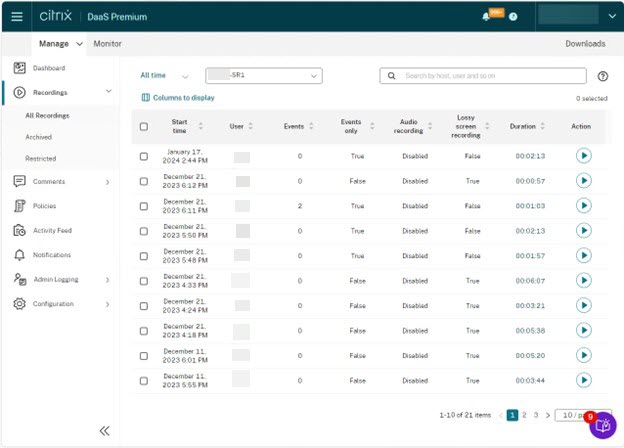
Manage Recordings: Click on the Recordings tab to see a list of all existing recordings made on the server. You can view and manage them here just like the on-premises Session Recording Player.
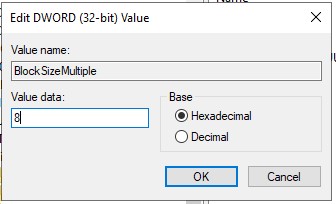
Improve Performance: Increase the transport packet size by following these steps:
- Open the Registry Editor on the Session Recording server and navigate to HKEY_LOCAL_MACHINE\SOFTWARE\Citrix\SessionRecording\CloudClientService.
- Look for the key called BlockSizeMultiple.
- Change the value from the default 4 (16KB) to 8 (32KB), then restart the server.
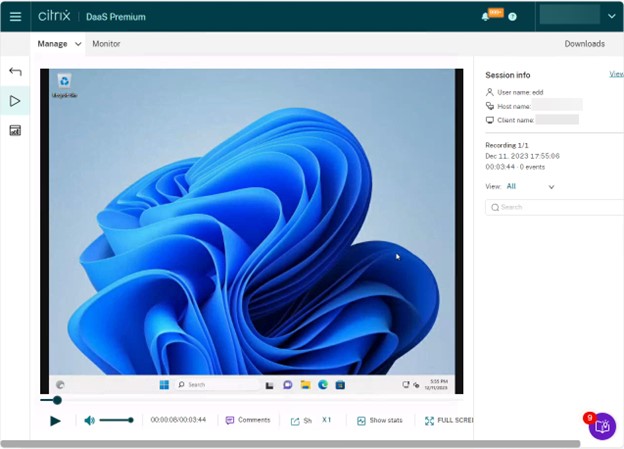
Manage Multiple Servers: If you have multiple Citrix Session Recording servers, you can add them and manage all from the Citrix Cloud DaaS management page. To view recordings, click the play button under the Actions column on the Recordings page. Playback for desktop recorded sessions will appear in a player provided in Citrix Cloud.
This completes our series on Citrix Session Recording. For more advanced features, refer to Citrix documentation. Integrating Session Recording with Citrix Analytics is recommended for additional security. Please comment on your thoughts about Session Recording, and I hope this series has been helpful in getting you started.
The views expressed by the author do not represent those of Citrix or Cloud Software Group.
Leave a Reply