

In this series, we’ve covered how to build and configure a Session Recording Server and Agent, as well as how to configure system-defined and custom session recording policies. In this post, we’re going to focus on event policies.
Event detection policies are triggered when a specific action or event occurs. When triggered, the Session Recording Server will perform an action defined by the administrator, which is the event response policy. Many different events can be configured as a policy. For a complete list of configurable events, see the Citrix documentation.
To demonstrate, we’re going to create an event detection policy triggered when a user launches PowerShell. The action we want Session Recording to take is to begin recording the session.
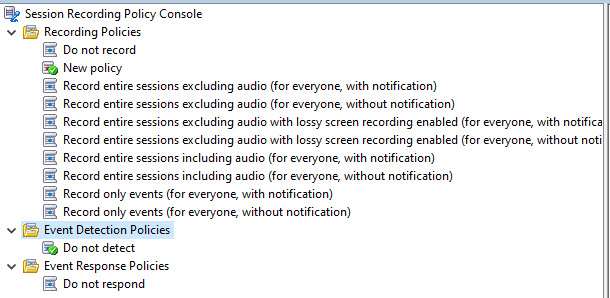
Configure Event Detection Policy
- Open the Event Detection Policy Folder: On the Session Recording server, open the Session Recording Policy Console, then expand the Event Detection Policies section. By default, you should see the Do Not Detect policy enabled.
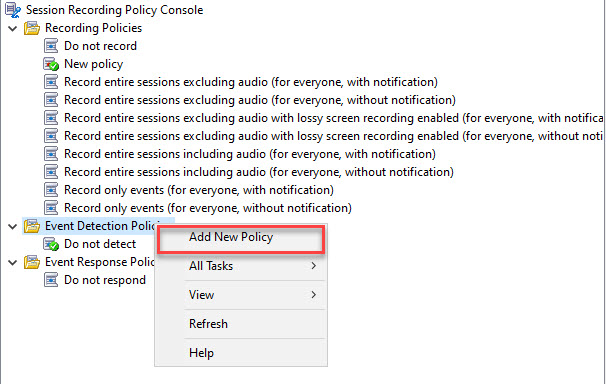
- Create new policy: Right-click the Event Detection Policies folder and select Add New Policy from the menu.
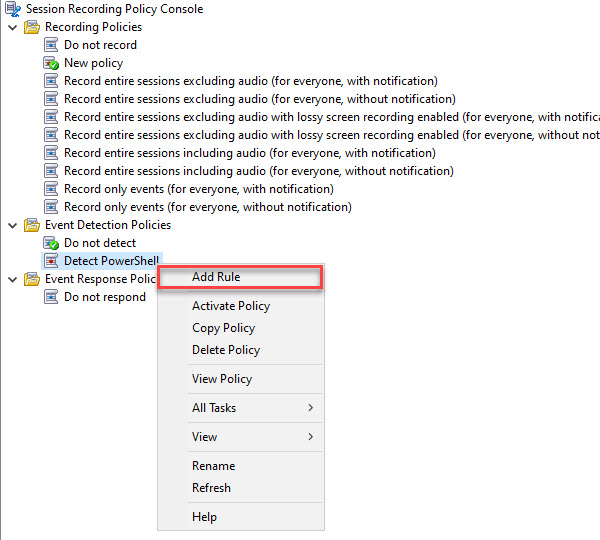
- Name the new policy: Right-click the new event detection policy and select Rename, then create a name for the policy.

- Add Rule: Right-click the new policy again and select Add Rule.
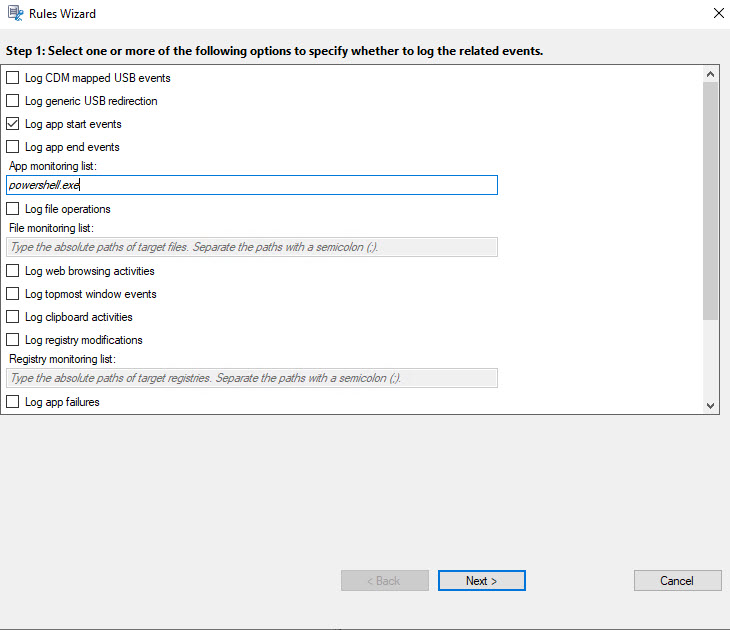
- Define Rule: In the Rules Wizard window, place a check next to Log app start events, and in the App Monitoring list, enter the process name of the application like “powershell.exe”, then click Next.
- Select Resource Type: In part 3 of this series, we created a custom policy that applied to a specific delivery group. I’m going to use the same delivery group again. Check the Delivery Groups or Machines box and click the Select Delivery Groups or Machines in the Edit the rule criteria section.
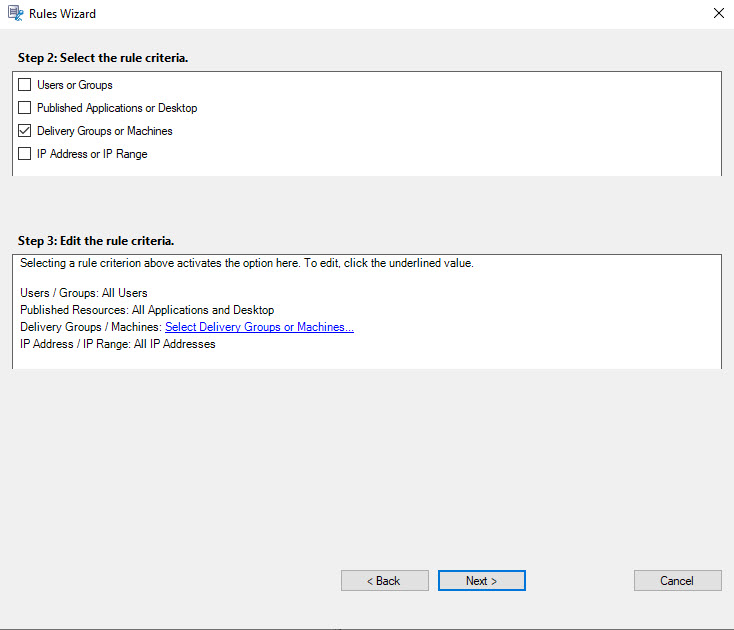
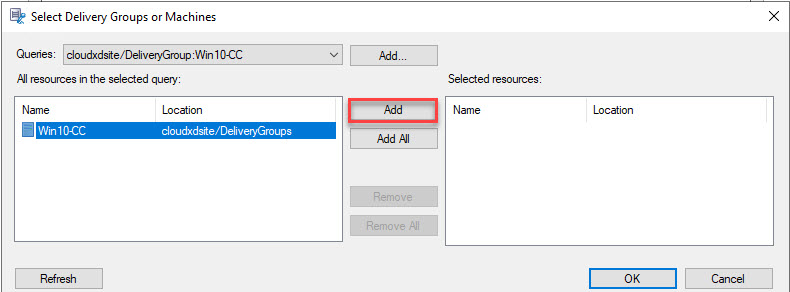
- Add resource: Select the delivery group from the All Resources section and click the second Add button to move it to the Selected Resources section, then click OK.
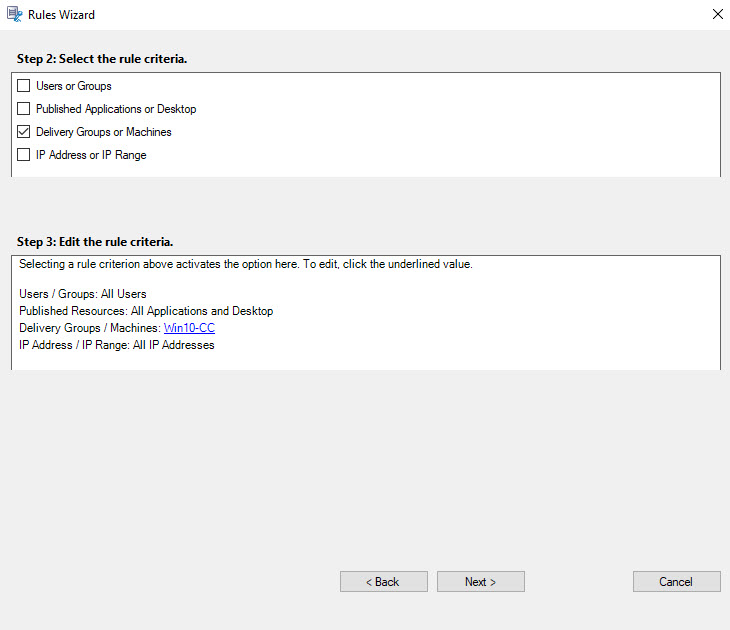
- Confirm resource: The delivery group should now appear in the Edit the rule criteria section. Click Next to continue.
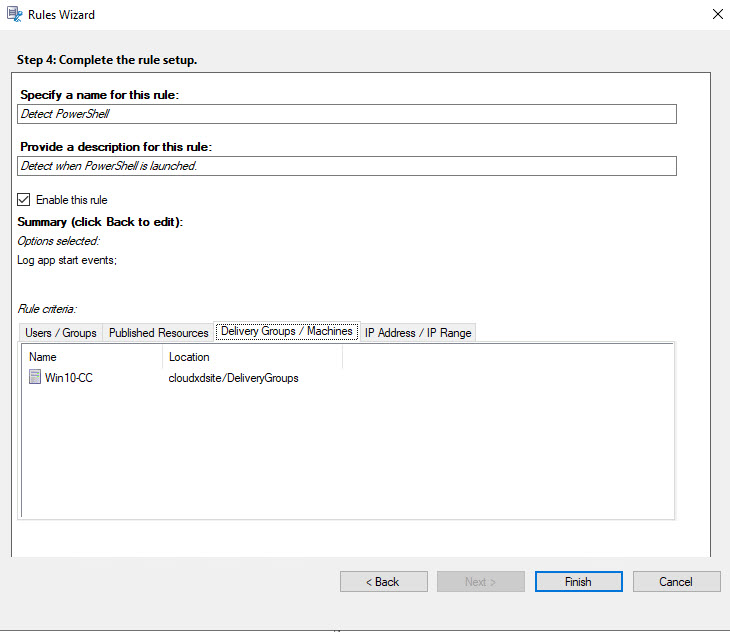
- Name and describe the rule: Specify a name and a description for the new rule. Click the Delivery Groups/Machines tab to confirm that the rule will only apply to the delivery group selected earlier. Click Finish.
- Activate the policy: You should now be back at the main Session Recording Policy Console window. In the Event Detection Policy section, the new policy is configured but not activated yet. Right-click the new policy and select Activate Policy.
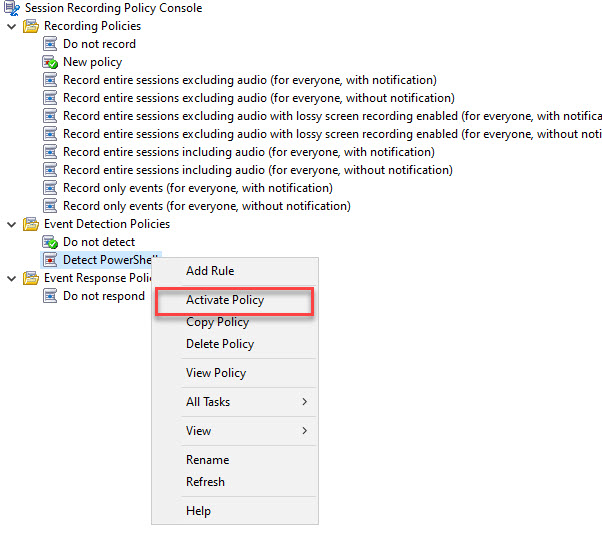
The new event detection policy should now be activated.
Configure Event Response Policy
Now that we have an event detection policy configured, we need to configure a response for the Session Recording Server to take. I want it to automatically begin recording the session when it detects a PowerShell launch.
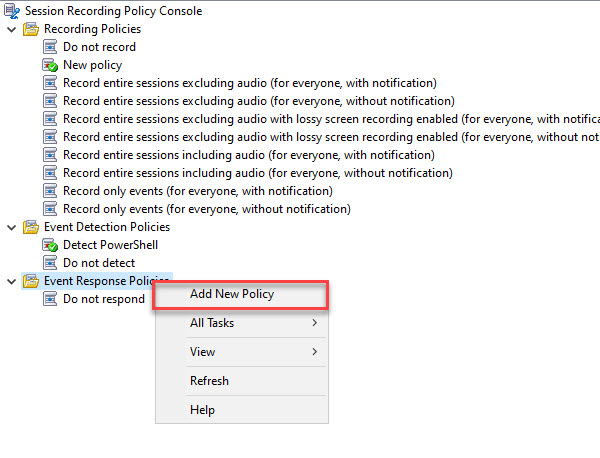
- Create new event response policy: Right-click the Event Response Policies folder, and select Add New Policy from the menu.
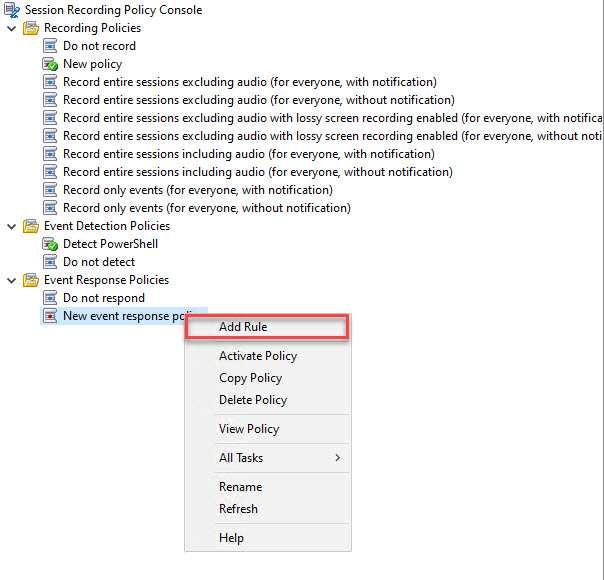
- Add rule: Right-click the new event response policy and select Add Rule.
- Trigger response action: Place a check in the Trigger response actions when a session event is detected box. Then click the Configure event triggers and responses button.
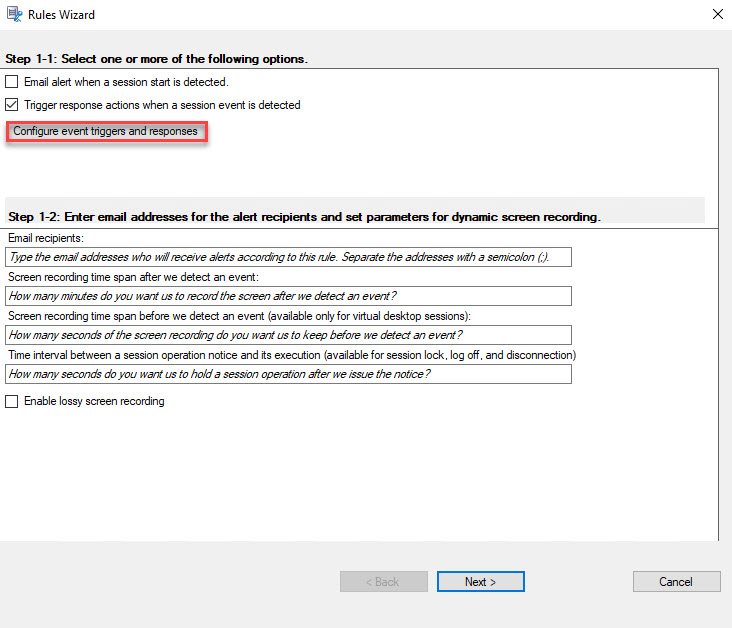
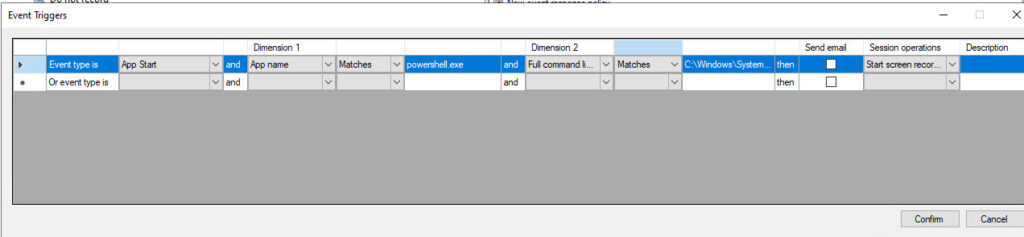
- Configure trigger response: In the Event Triggers window, configure the following settings (different from the image pictured):
- Event Type is: select App Start
- And App Name – Includes: type in powershell
- Full command line includes: leave blank
- Send email: Leave unchecked since SMTP is not configured
- Session operations: select Start screen recording
Click Confirm when complete.
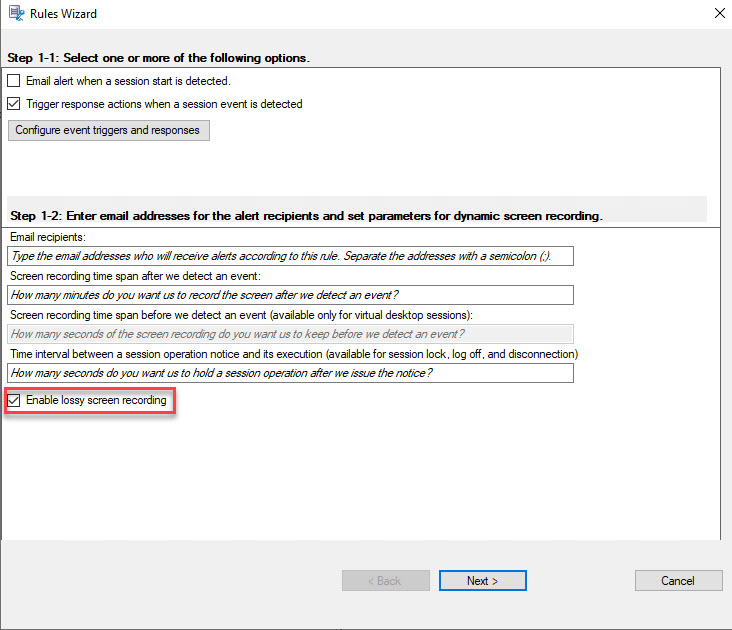
- Optional: Specify whether to perform a lossy screen recording, then click Next.
- Select resource: Go through the steps again to select the delivery group that the event responses will apply to and click Next.
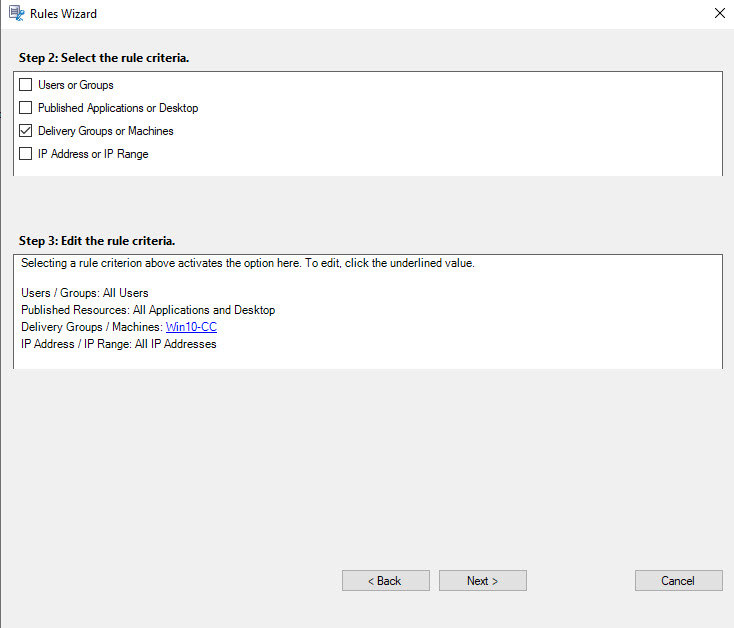
- Name and describe the rule: Provide a name and description for the rule. Confirm the delivery group that the rule will apply to by clicking the Delivery Group/Machines tab, then click Finish.
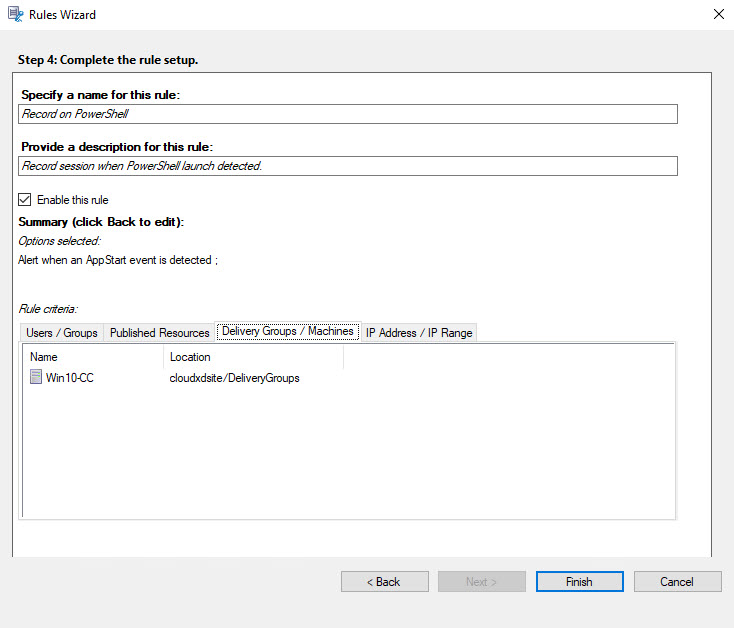
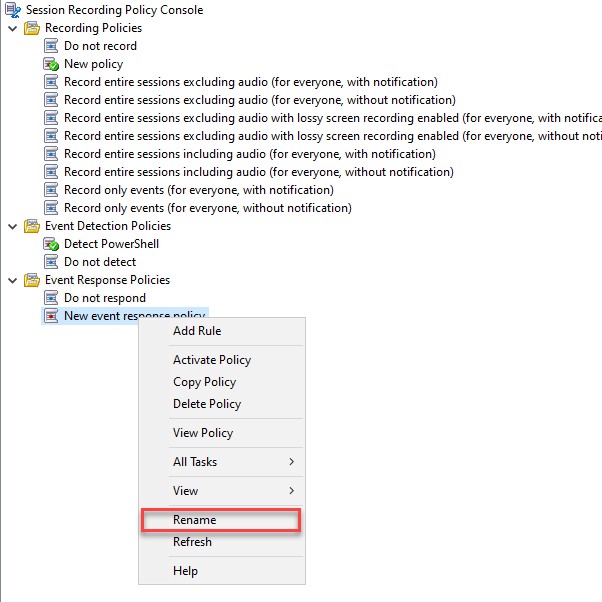
- Name the policy: Right-click the policy and select Rename from the menu. Give the new policy a name like “Record on PowerShell”.
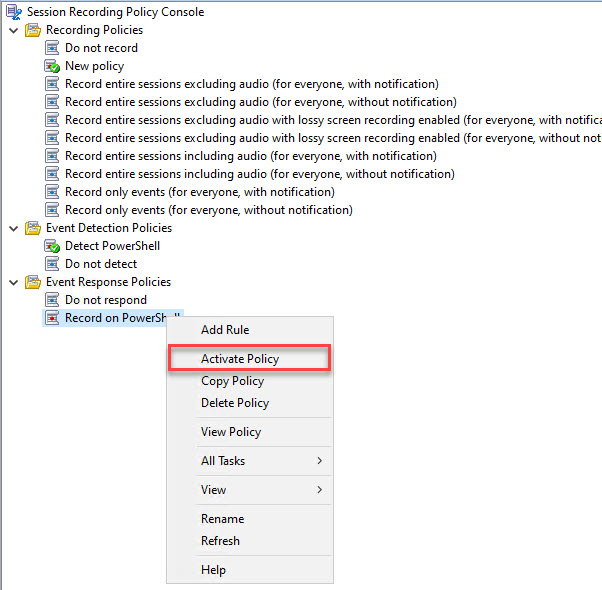
- Activate the policy: Right-click the policy name again and select Activate Policy.
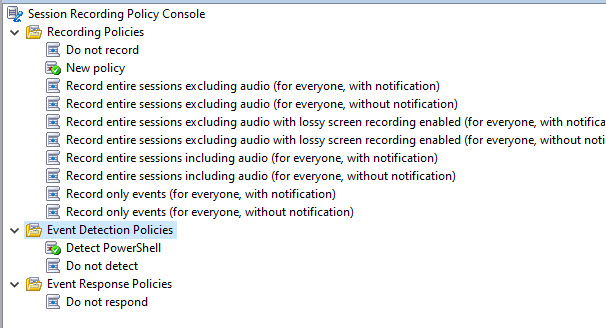
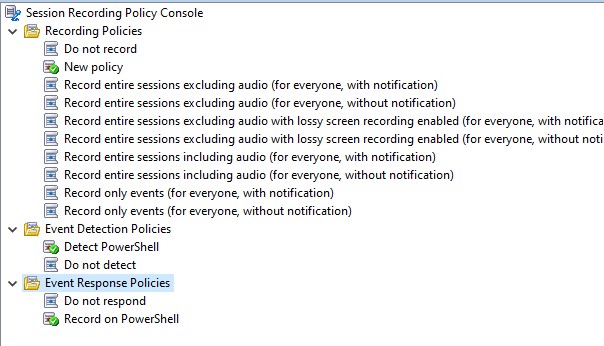
The event detection and event response policies should both show as active.
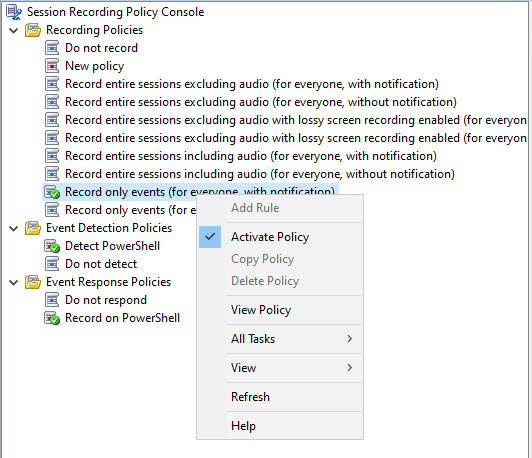
Reconfigure Recording Policy
We ended part 3 of this series with the Recording Policy set to record the entire session. We need to change it to only record events.
- Change the Recording Policy: Under the Recording Policies folder, select Record only events (for everyone, with notification).
- Activate the policy: Right-click the policy and select Activate Policy.
Confirm Policies Are Working
- Test the policies: Start a session on the Session Recording Agent VDA machine.

- Trigger event detection: Try launching PowerShell and then close out of it.
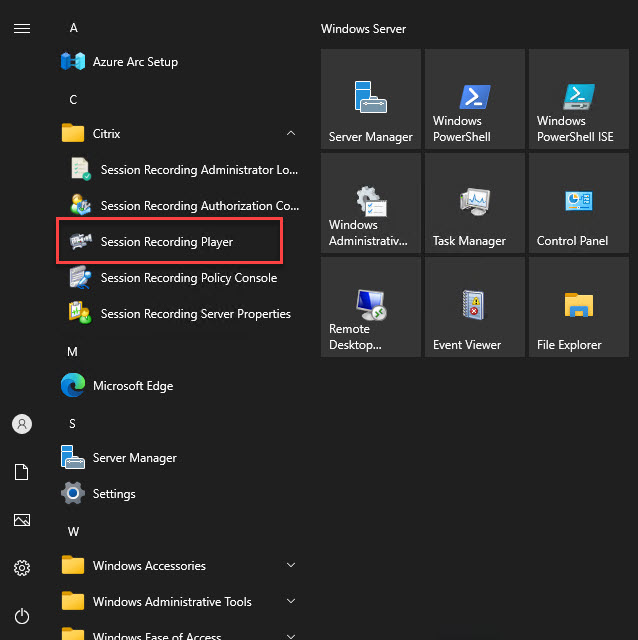
- Open Session Recording Player: On the Session Recording Server, launch the Session Recording Player.
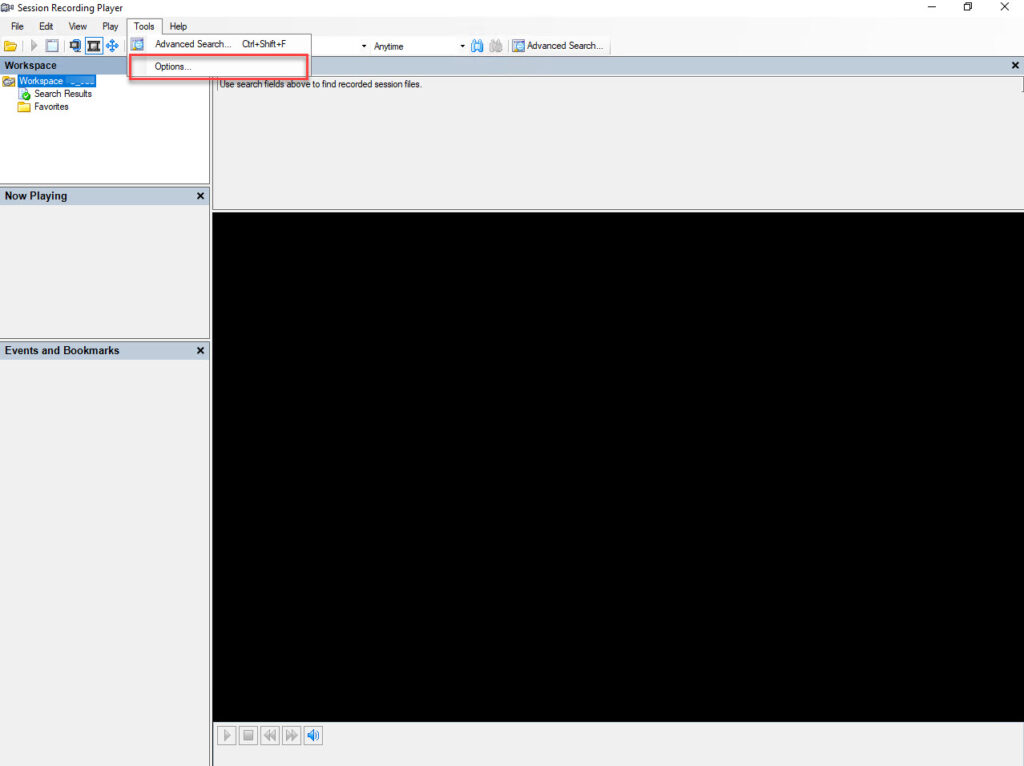
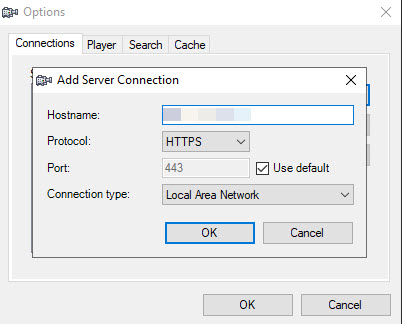
- Connect the Player to the Server: Since this is our first time running the Session Recording Player, we need to connect the player to the Session Recording Server. From the menu, click Tools then Options.
- Add the Session Recording Server: On the next window, click the Add button and then enter the name of the Session Recording Server.
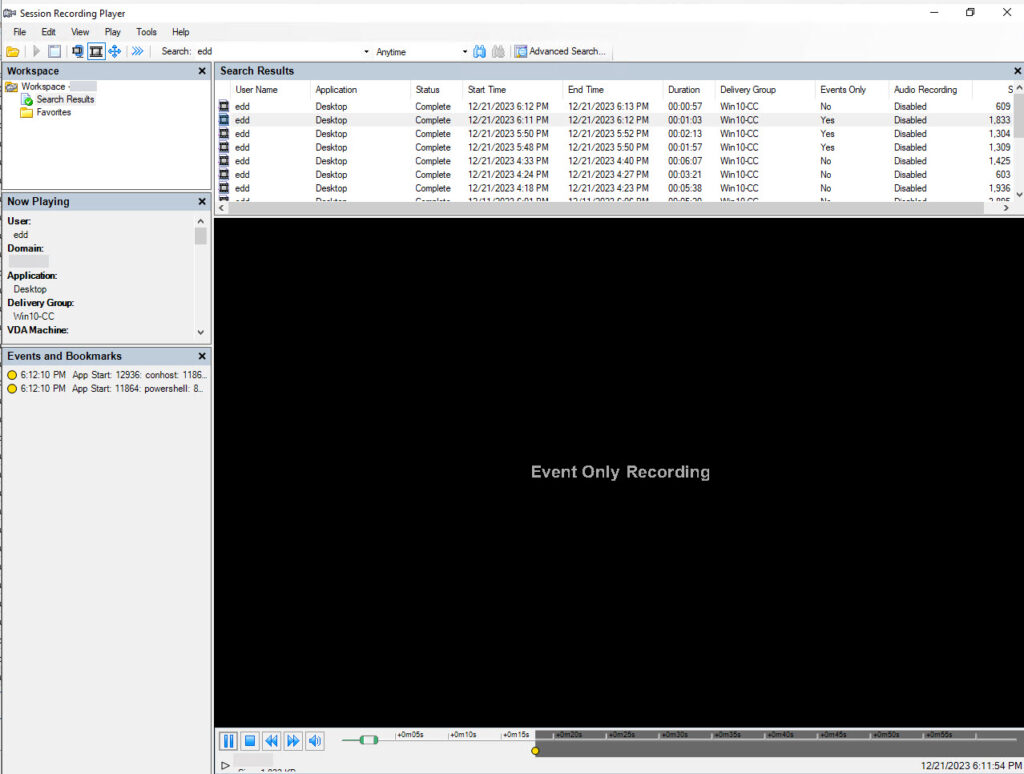
- Search for recordings: In the Search field, you have several options to search for recordings. Searching by username is often the easiest method. You can also search by server, application, delivery group, event text, client name, client address and File ID. You can specify a time range such as anytime, last year, last month, last week or last 24 hours. There’s also an Advanced Search for more granular searches. For this demo, search for recordings made by yourself using your username.

- Review recordings: The two most recent recordings are the ones of interest. In the Events Only column, the second most recent one shows “Yes”, meaning it is only recording events. You won’t see anything in the player other than showing that it is an Event Only recording.
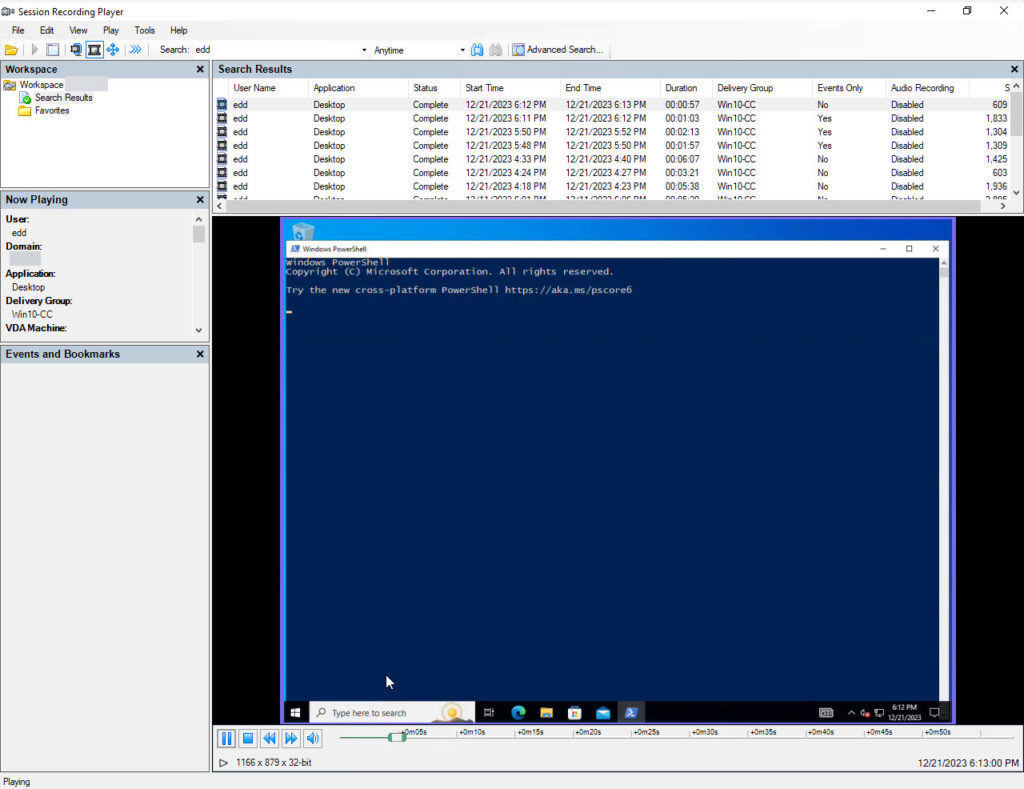
- Once it detects that PowerShell launched, it begins a new recording this time capturing the desktop session. The top recording file reflects that it is no longer recording events but the entire session in the Events Only column. You can view the PowerShell session that you launched on the Agent VDA.
In the final post in this series, we’ll look at how you can integrate an on-premises Session Recording Server with Citrix Cloud.
The views expressed by the author do not represent those of Citrix or Cloud Software Group.
Leave a Reply